Showing posts with label camping. Show all posts

Wednesday, August 8, 2012

Wonderful Wednesday - Campers Doughnuts


This is a post that I am very excited to share with you. When Angela from Angela's Kitchen and I started talking about the Gluten Free Camping Series I knew I had to make doughnuts. Camper doughnuts are a staple for most camping trips and I have fond memories of making them as a child. The basic gluten filled campers doughnuts are simple and use canned biscuit dough, which is then fried in oil. Since there is no pre-made gluten and dairy free biscuit dough I had to figure out from scratch.
Before we start a few notes on cooking with oil over an open fire.
1. Have a tight fitting lid close by.
2. Don't wear lose clothing and have your hair pulled back.
3. Make sure you have everything you need before you start.

Make doughnut shape with wet hands.

Long tongs are key for flipping over the campfire.
Blueberry Lemon Campers Doughnuts
What you need:
2 cups Bob's Red Mill Gluten Free Biscuit & Baking Mix
1/2 cup sugar
1 egg
2 Tbs oil
1 cup dairy free milk with 4 Tbs lemon juice (let sit 5 minutes)
2 tsp orange extract
1/4 cup mashed blueberries
1 cup whole blueberries
Bowl of water to dip your hand in.

Directions:
Combine the baking mix and sugar together and make sure to break any lumps up. Add the egg, oil, orange extract, milk and mashed blueberries to the baking mix and stir to combine. Gently fold in the remaining blueberries.
For frying in oil
Heat 2 or 3 inches of oil in a large dutch oven either over a fire or camping stove. Test the oil to see if it is hot enough by dropping in a small ball of dough. You want the dough to float in the oil and sizzle not sink to the bottom. Fry till golden brown on either side using a fork or wood skewer to flip. Remove from oil when golden brown and set on a plate with paper towels to drain. You can also place them in a bag with either powder sugar or cinnamon and sugar and shake to cover.
You can also leave out the blueberries and make lemon doughnuts that turn out just as good as the blueberry ones.
If you don't want to fry the doughnuts you can bake them at 350 degrees for 20 minutes turning the doughnut pan half way through.

They are even yummy baked!


Wednesday, July 25, 2012

Wonderful Wed - Gluten and Dairy Free Camping

It is time again for another installment of camping gluten and dairy free. Today's idea and recipes are brought to you by Angela of Angela's Kitchen. She shows us all how to make foil packets, which is something that I love to use while camping and at home (throw them on the grill!) She has great pictures and recipe ideas that show how to make your own foil packets and steps you need to take to make sure they come out right. No one likes burnt and raw food together! I can't wait to Ranch Chicken Casserole or the hobo meals! Go check it out here!

Wednesday, July 18, 2012

Wonderful Wednesday - Orange Brownies

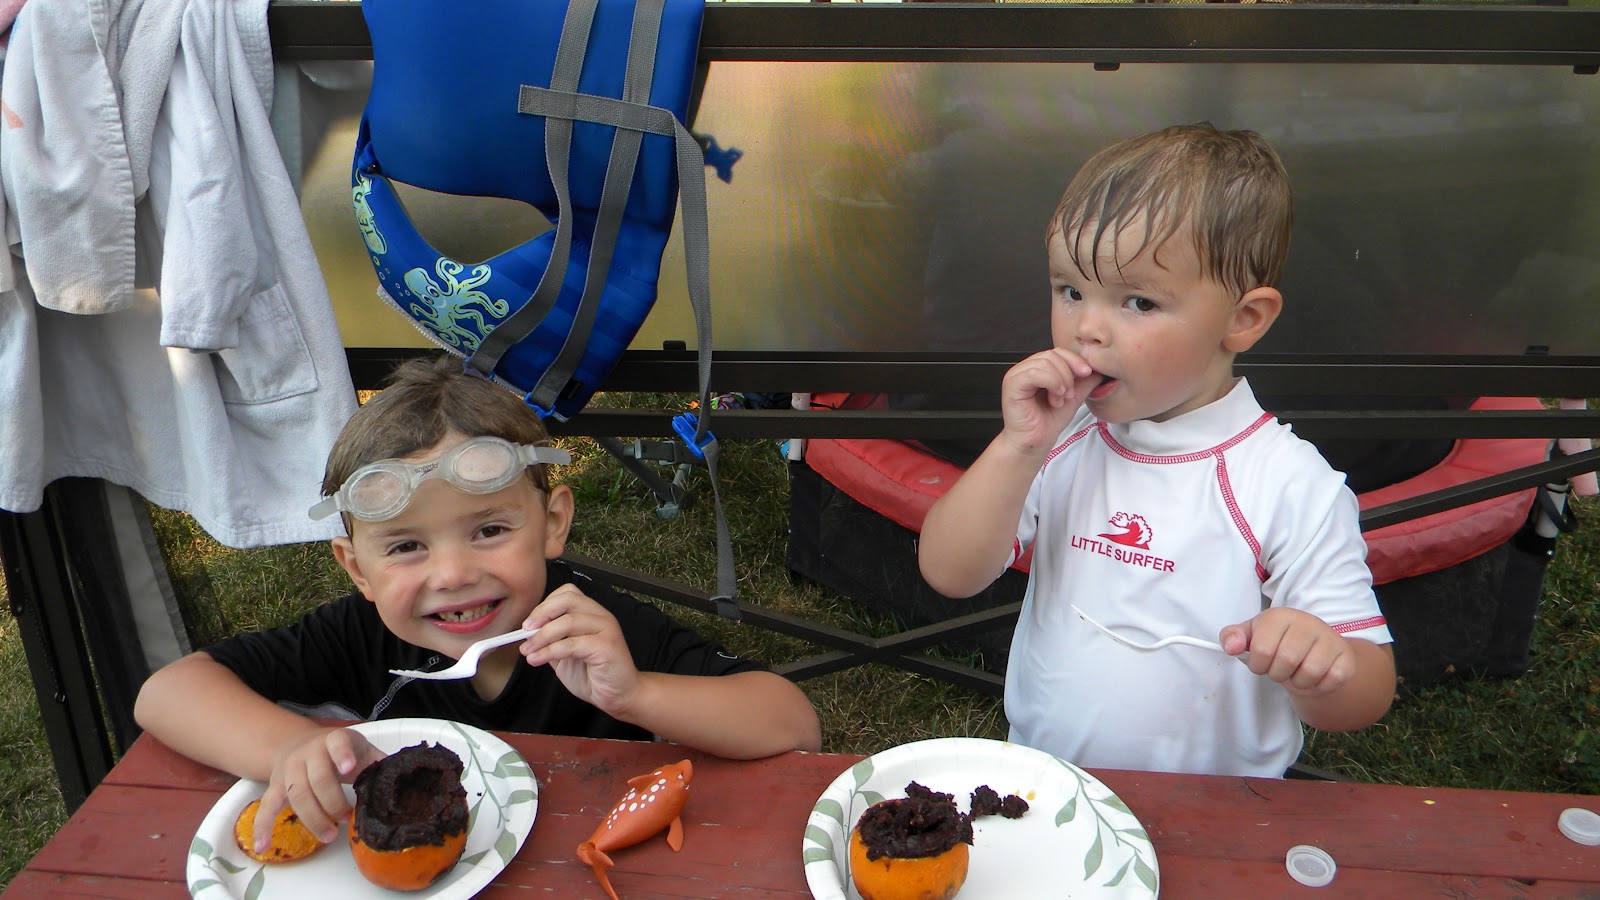
This summer Angela from Angela's Kitchen and myself have been doing a gluten free camping series. I have also teamed up with Bob's Red Mill to work on a camping series with them as well. (I camp all summer so this is what we really eat!) Today's recipe/technique is a bit different but is tons of fun. We are going to bake our brownies in an orange. Yep an orange and it really turns out yummy.

Orange Campfire Brownies
What you need:
1 Bob's Red Mill gluten free brownie mix
3/4 cup warm water
2 tsp orange extract
1 egg
3/4 cup melted butter
12 - 14 oranges

Directions:
Cut the top off an orange and run a knife around the inside edge of the orange. You want to get most of the orange out because that is what we bake in. There will be some left in the bottom that you can't easily get out and that is alright. You can also try a grapefruit spoon but it works about as well as the knife does. After you have the orange hollowed out place the lid back on the top and repeat with the rest of the oranges. When all the oranges have been hollowed out make the brownie batter as directed on the package, substituting the orange extract for the vanilla. Fill each orange almost full with the brownie batter and tap gently to help batter settle in. Top with the top slice of orange peel and wrap with foil, making sure to keep the orange upright. Next place the oranges around the coals of the fire and turn every 2 1/2 to 5 minutes depending on the heat of your fire. They bake 12-20 minutes depending on the heat of your fire. They will still look wet on top of the brownie but that is from the orange top. Let cool a few minutes and enjoy!


They were voted as yummy.

Wednesday, July 11, 2012

Wonderful Wednesday - Dutch Oven

Welcome to another edition of Camping Gluten Free. It is my turn this week and I have a treat for you. Dutch ovens are considered standard camping gear for many people, myself included, and I wanted to share some easy updated recipes. We will just pretend that the pictures are over a fire or camp stove when they are really taken inside my camper. Here in Central Illinois we have been hot and dry for weeks, so there is a no burn order in effect until further notice. I was going to cook outside and get some lovely pictures for you but the wind kept blowing out the burner on my camp stove. So I cooked inside but it works out all the same.
My Dutch ovens are the old cast iron ones; one has a lid and the other does not. If you do not have a lid for your Dutch oven you can use foil unless you are baking. In these recipes I use the Dutch oven as a cooking vessel over open flame or on your camp stove. You can use a Dutch oven for baking and then you want enough coals for the top and bottom of your Dutch oven to create equal heat. Now the good stuff!

Breakfast scramble
What you need:
Dehydrated potatoes (dehydrated) or parboiled potatoes
Bacon
Onion
Eggs
Salt and Pepper

Directions:
Chop the bacon into small pieces and saute with the onion until the bacon is crisp. Add the potatoes into the pan and cook till desired colored is reached. Make a hole in the center of the pan and add the eggs in. Scramble the eggs and mix everything together. Add salt and pepper to taste. This is great the way it is or you can use it as a breakfast burrito stuffing.


Another idea is to use your freezer meals that are already made. This way you can pull them from the freezer and pack them straight into the cooler. As they thaw you can use them for the next meal and have more space in the cooler.
A great one from Angela is beef and butternut squash stew, this one is on my cooking rotation.
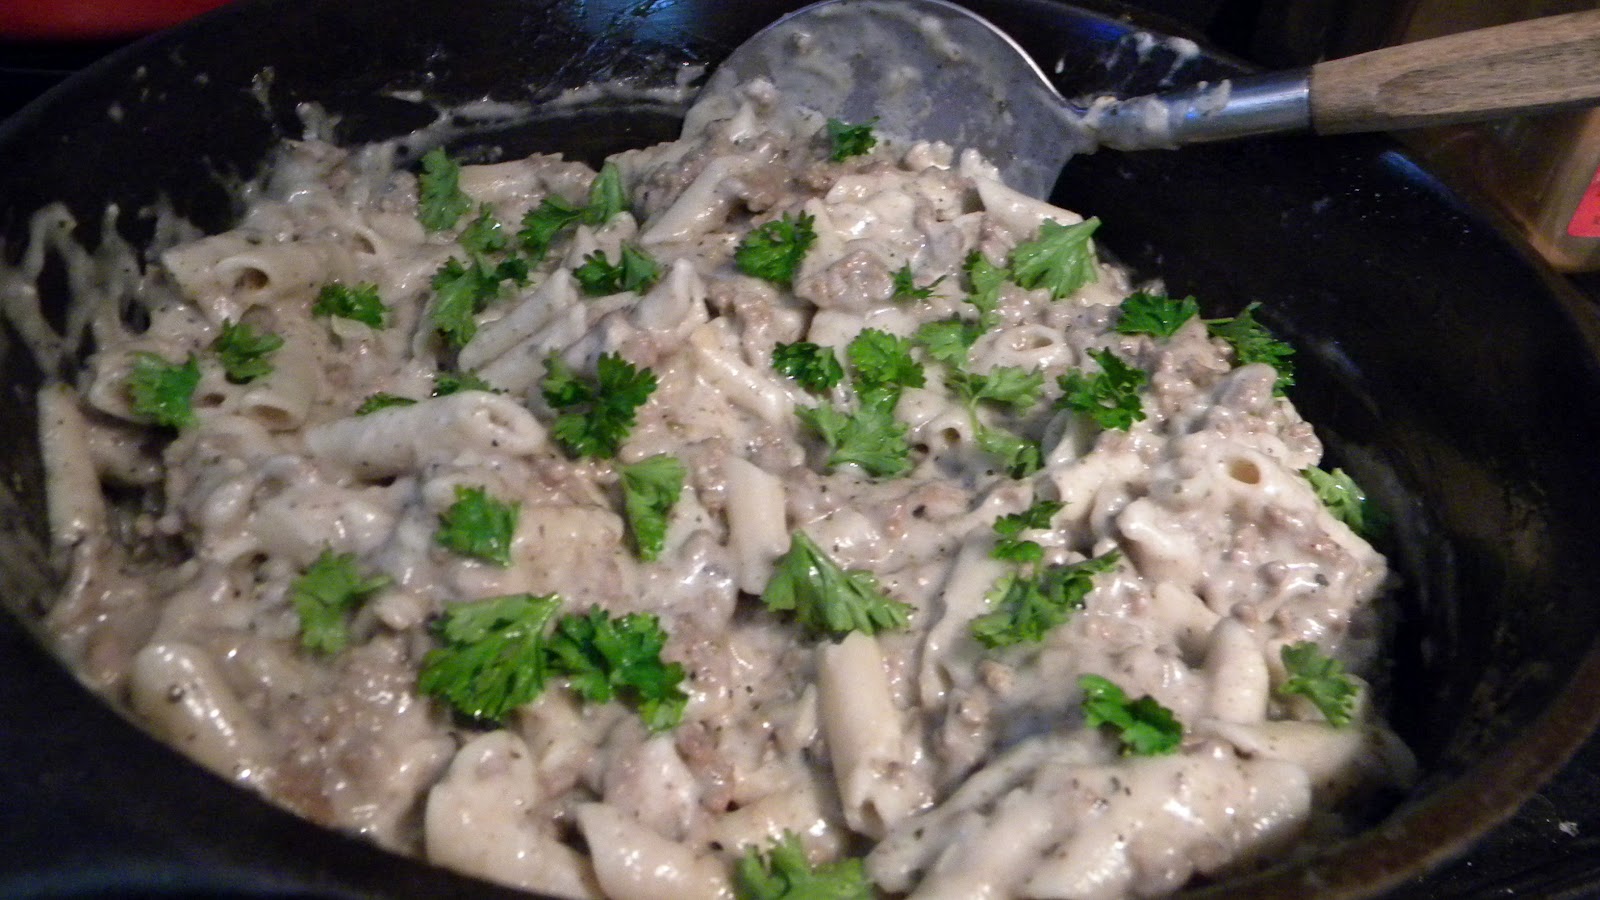
I also use my ground beef stroganoff recipe because it is an easy hearty meal.


Ground Beef Stroganoff
What you need:
1 lb ground beef
1 large onion
3 cloves of garlic
1 tsp Italian seasoning
This is what it looks like thawed.
3 T gluten free flour blend
1 1/2 c beef stock
2 tsp red wine vinegar
salt and pepper

When you serve:
1 cup sour cream (or dairy free alternative)
Noodles, Rice, or Potatoes

Directions:

Brown the ground beef and onion in a large pot. When the ground beef is cooked through, remove the cooked ground beef and onion. Add the gluten free flour blend of choice and wisk to combine with the rendered fat left in the pan. Once the flour is mixed in smooth and is starting to bubble, slowly add the beef stock constantly stirring. It is important to stir well so you do not get lumps. With the beef stock added, add the garlic, Italian seasoning, red wine vinegar, the cooked ground beef and onion mixture to the pot. Here is where I cool the stroganoff base and freeze it.
To Serve:
Thaw the stroganoff and warm over medium low heat. While the stroganoff is warming cook desired noodles, rice or potatoes according to package directions. When warm stir in the sour cream (or dairy free alternative) and top with parsley when fully heated.

See how yummy it looks.


White Chicken Chili is another freezer recipe that works great in the Dutch oven.
 To make it extra special you can add the cornmeal dumplings that follow.
Chicken Chili with dumplings and cheese.


White Chicken Chili
What you need:

1 medium onion, chopped
1 4oz can of diced green chilies 
2 garlic cloves, minced
1 tablespoon vegetable oil
4 cups chicken broth
2 (15.5 ounce) cans great northern beans, rinsed and drained

2 tablespoons minced fresh cilantro
1 tablespoon lime juice
1 teaspoon ground cumin
2 cups cubed, cooked chicken

Directions:

In a large pot combine the oil, garlic, green chilies and onion and saute until the onion is soft. Next add the broth, beans, cilantro, lime juice, cumin and cooked chicken. Bring to a boil and simmer 5 minutes. If freezing let cool and freeze in zip top bags or jars.

To Serve:
Thaw the white chicken chili and warm over medium low heat in a large pot. You can stir in sour cream, radishes, salsa or raw onion if desired. It is also wonderful with the cornmeal dumplings.


Cornmeal dumplings
What you need:

1 1/2 cups Bob's Red Mill Gluten Free Cornbread mix
1/2 tsp salt
1 cup boiling water

Very stiff dough!

Add them in.
Directions:
Mix together the cornbread mix and the salt in a large glass bowl. Carefully add in the boiling water and stir until a firm dough starts to come together. You will need to kneed the dough with your hands to work in the last of the cornbread mix. It will all absorb in to make a very stiff dough. Next take the dough and roll into quarter size balls. When you have all the dough rolled into balls carefully add them one at a time into the simmering chicken chili. Cover with a tight fighting lid and let cook over low heat for 20 minutes. Do not open the lid while they are cooking except to check how they are cooking after 15 minutes have passed. They make the chili nice and thick and round out the meal nicely.

All done simmering.


My Dutch oven will be making another appearance in August when I show you how to make campers doughnuts! What is your favorite topping?

Wednesday, June 27, 2012

Wonderful Wednesday - campfire pizza and short cut s'mores

As both Angela and I talked about last week, we are doing a camping series on how to camp gluten and dairy free. This week it is Angela's turn and she is doing campfire pizza and short cut s'mores. I love her idea for using cookies instead of the traditional graham cracker! I also think we will have to try the pizza over the campfire this summer. Go check it out here!

Wednesday, June 20, 2012

Wonderful Wednesday - Pie Iron's

So Angela from Angela's Kitchen and I are doing a gluten free camping series this summer! We both love to camp and feel that every child should get to experience the joy and fun of traditional camp food. I get to kick it off with pie irons!
 If you were ever a girl scout, boy scout or camped you might know what I am talking about when I said pie irons. If not this is what you have been missing. Pie irons are two plates of metal that hinge together with a cavity on the inside when they are together. It is in this whole that you place all sorts of yummy fillings and play in the coals of a fire. As you would imagine it gets very hot so you need to be careful with them as they will brand anything and kill the grass when you set them down. I should know, I have a scar on my knee from one when I was young girl scout. Lesson learned, don't repeat my mistake!
As dangerous as they sound they are easy to use and lots of fun in the process. My kids love it when I get our pie irons out because they know some good food is coming soon.

Fit several extra foil sheets to change out when needed.
Helpful hints about pie irons
1. Use foil in your pie irons. (It prevents cross contamination but also means you don't have to scrub the clean.)
2. You need a pot holder close as the clasp will get very warm.
3. A good bed of hot coals helps them to cook faster and more even.
4. Have a good imagination and have fun!


Now for the good stuff, recipes

Gather what you need.
Pie Iron Pizza's
This one is a classic so I wanted to make it gluten and dairy free for my kids
What you need:
gluten and dairy free bread (I used Udi's at room temp)
pizza sauce (read the label)
Dairy free cheese (I used Daiya)
Pizza toppings of your choice (olives, peperoni, peppers, onions, etc)
Butter


All the pizza yummies piled in.
Directions
Make sure you have a nice bed of coals ready and line your pie irons with foil. Butter two slices of bread and place one slice butter side down on the foil. Now top your bread with the pizza sauce, cheese and any other toppings that you want. Place the second slice of bread butter side up on top of your pizza toppings and close the lid. Latch the pie iron closed and place directly on the coals.


Depending on how hot your coals are it will take about a minute per side. You will want to check it for how brown and toasty you like your bread to be.


Nice hot red coals.


Perfect!


 Breakfast Pie Irons

What you need:
Precooked frozen gluten free sausage links
Hash-browns (I used soaked dehydrated ones)
Eggs
Oil

                                                                                  Directions


Sausage in first
Make a wall to hold your eggs.
Line your pie iron with foil and oil both parts of the pie iron. Place the frozen sausage links in the bottom followed by the eggs. It will take some wiggling or building a wall with hash-browns to get the eggs to stay where you want them to. Top the eggs with hash-browns and close the pie iron. Start with the sausage side down in the fire, it will need the most time to warm up and brown. Flip to the other side after a minute or two. This one will take some back and forth flipping and checking to make sure it is done.
Perfection!


Hamburger and hash-browns

What you need:
Hamburger
Hash-browns (I used soaked dehydrated ones again)
Oil

Directions
Pat the hamburger into a thin patty that fits into the pie iron. Top with hash-browns and oil the foil that is going to touch the potatoes. Start on the hamburger side but change to the hash-brown side to ensure you don't overcook the hamburger. It will taste almost like a steak when it is done.


Pie Iron Pies (This is the best!)

What you need:
Gluten and Dairy free bread (I used Udi's again.)
Pie filling of choice (Try this one.)
Dairy free butter substitute of choice

Look at the filling ooze
Directions
Butter your bread and place one slice butter side down in your pie iron. Place your pie filling of choice on top of the bread and top with the other slice of bread butter side up. Place your pie iron in the fire and cook till golden brown. You can top with powder sugar if you want also or eat them as is. The best part about them is the butter makes an almost fried crust to the bread.


Pie Iron Pancakes

What you need:
Pancake batter
Oil


Directions
Add a small amount of oil to the bottom of your pie iron and add enough pancake batter to cover the bottom. Use a paper towel to oil the other side and close the pie iron. Keep it level over the coals and let cook for about a minute before turning. You want to give it time to set up and flip it fast or it will bunch up. Top with your favorite fruit or syrup!


Other ideas to make in pie irons
Taco meat in between bread
BBQ
French toast
Scrambled eggs
Toast with egg in the middle
BLT
Sandwich meats
Muffin Mix

Have fun and go crazy with your choice of fillings! What are you going to try first?