Monday, July 30, 2012

Misc. Monday - Dog Food

Buddy and his dog food
We have a black and tan dachshund named Buddy who is just over a year old and lives for my boys. Buddy is a special dog as he is also gluten and dairy free. He is fed this way for several reasons, one of which is the reason that my kids feed him. Yes, they wash their hands but there still is that chance of them being cross contaminated. Another reason being the fact that Buddy loves to give kisses! We have discovered that kisses from other dogs can cause gluten exposure which is not a fun few days.
Not very pretty in the jar.
This past spring Buddy stopped eating his dry dog food, which was not like him. We tried a few sample for a more expensive dog food which he seemed to like, but soon after we bough the new dog food there was a recall on it. We looked and looked for another grain free dog food but we could not find one that did not have a recall on it. This is when we decided to make our own.
A few notes about homemade dog food.
Buddy is fed daily a dog multivitamin which I find at our local health food store.
Buddy gets snacks of raw veggies.
Dogs fed wet food will overeat because the food is there. This is why portions are important.
Buddy gets one 1/2 pint a day because he is under 20 pounds and active.

Beef Dog Food
What you need:
1 pound ground beef
2 pounds ground heart (my meat locker ground for me)
2 pounds ground liver (or other meat)
1-2 pounds of veggies frozen
water or broth
no more than 2 1/2 pounds cooked rice (We did not add rice to save on jar space. It is added when fed.) 

Directions:
Combine meat, veggies and water/broth together and mix. Pack into hot jars, wipe tops and put rings and bands on. Process at 10 pounds of pressure for 75 minutes. This will make 19 half pints without the rice added. With the rice added it would be around 29 half pints.
The best part about this is you can mix and match meats and veggies to use what is on hand. Just make sure they are veggies that your dog can have!

Licking them clean!


Don't forget that I have a giveaway going on right now! Click here to enter. Remember for each entry you need to leave a separate comment on the blog!

Friday, July 27, 2012

Fast Friday - Cantaloupe Jam

I can. There is no question about it but I have a new book in my collection which is food in jars by Marisa McClellan. What I love about her book is that it is small batches. Which is perfect for those who are starting out canning. The recipes can easily be done in a larger amount, which is what I did when I canned all the peaches. I used her peach jam recipe and it was my new favorite way to eat peaches. I had so many different ideas of where to start when I looked at the book because it is written to be used year round. With canning our own dog food we can year round but now I have easy ideas that I can make whenever I want.
The cantaloupe jam that I am writing about I made the other night and I knew it was one I would be repeating. I agree with Marisa that it does almost taste like a Creamsicle and it is something I will be making again and again this summer. I love this book so much that I am going to give a copy away to one lucky reader! The details are below but first the recipe.

Cantaloupe Jam
What you need:
2 1/2 cups chopped peeled cantaloupe
1 1/2 cups sugar
1 vanilla bean, split and scraped
Zest of 1 lemon
1 Tabelspoon fresh squeezed lemon juice
1 3oz pack of liquid pectin

Directions:
Combine cantaloupe, sugar and vanilla bean in a pot and bring to a boil. Boil for 8 to 10 minutes over high heat. Add the lemon zest, juice and pectin and return to a vigorous boil. Boil for another 3 to 4 minutes until the bubbles look thick. Remove the vanilla bean or you will be filling jars and come across it! Ladle into 3 half pint jars, wipe the top clean and apply lids. Process in a boiling water bath for 10 minutes. Before you soak the pot clean, scrape and lick clean. At least that is what we do in my house!

Now for the good stuff! How to enter to win a copy of the book.
One entry:
Look through the preview of the book here and tell me what you would want to try first.
One entry:
Subscribe to my e-mail so you don't miss anything. Leave a comment saying you did so.
One entry:
Like me on Facebook and leave a comment saying that you did.
One entry:
Share the giveaway on Facebook or Twitter and leave a comment saying you did.

The contest will run through August 3rd and I will use a random number generator to pick the winner. Go!

Wednesday, July 25, 2012

Wonderful Wed - Gluten and Dairy Free Camping

It is time again for another installment of camping gluten and dairy free. Today's idea and recipes are brought to you by Angela of Angela's Kitchen. She shows us all how to make foil packets, which is something that I love to use while camping and at home (throw them on the grill!) She has great pictures and recipe ideas that show how to make your own foil packets and steps you need to take to make sure they come out right. No one likes burnt and raw food together! I can't wait to Ranch Chicken Casserole or the hobo meals! Go check it out here!

Monday, July 23, 2012

FrannyCakes and RSD

I had the pleasure of meeting Mary Fran Wiley of frannycakes while at the Gluten Free Expo in Chicago. Little did I know that we have more in common than being gluten free. She came out with her dirty secret that she has RSD. If you read my bio you know that I have RSD as well. After reading what frannycakes had to say I wanted to write about my experiences as well.
My series of evens started in Jr. High when I fell over a net in gym class. I was put on crutches and my left knee healed. I had problems on and off with it swelling but never thought much about it. Freshmen year of high school in the fall my knee swelled and the doctor put me on crutches. That was the beginning of the end of normal life. My knee and lower leg got to the point where it was cold, blue and even a sheet touching it would cause pain. The next four months I bounced from doctor to doctor getting no real answers except to tell me to pray that I don't have RSD. I was finally taken to Shriner's Children Hospital in Chicago when I was diagnosed with RSD, what every doctor told me I didn't want to have. At this point I had not walked in almost 6 months and was in extreme pain all the time. I endured extensive physical therapy and started therapeutic horse back ridding. I went into remission eventually and went on with my life living in mild pain.
Fast forward to 2 years ago and I had "Mommy thumb" from picking up my then infant son. We were getting ready to go on vacation and I took the easy way out. Which I knew I was taking a risk because any injury can spread RSD. While we were on vacation the pain started in and has gotten worse since then. I manage my pain with my tens unit, lidocain patches and prescriptions.
When I was in Chicago at the Gluten Free Expo I too was given the advice that a change in my diet or the GAPS diet would cure me. It is not that easy to "cure" RSD. Trust me we all wish it was. I was told when I was 15 that I would be wheelchair bound early in my life. I have fought hard to prevent that and I keep going as long as I can. With having two small boys I take time to make memories with them because I know there will be a point in time where I can't. I did not come here to be a downer but to offer support to a fellow blogger. It is a rough rode that those of us with RSD have but my goal is to live it day by day with the help of the great support system I have.
From https://www.facebook.com/SurvivingChronicPain

Friday, July 20, 2012

Fast Friday - Bread Sticks

This is an easy one that I love to grab when I need a meal in a hurry. I even use frozen pizza crust if I really want to cheat. My kids love these as much as I do! I forgot to grab a picture before we all started mowing down on them! So there are a few missing bread sticks. As I am posting this Caden is yelling, "Yum! Pizza! I found Pizza!"


Cheesy Bread Sticks

What you need:
2-3 Tablespoons of butter substitute
1/2 - 1 teaspoon garlic salt
Dairy free cheese (I use Daiya)
Nutritional yeast (I love this stuff!)
Other toppings (pepperoni, onions, olives, etc) 

Directions:
Melt the butter substitute and stir in the garlic salt. Spread the garlic butter mixture onto the pizza crust and sprinkle on the nutritional yeast if using. Cover the pizza dough with the non-dairy cheese and any other toppings desired. Bake according to directions for the pizza crust. When done cut into strips and serve. We eat them as they are but they would also be good dipped into some warm pizza sauce.

What is your go to easy meal?

Wednesday, July 18, 2012

Wonderful Wednesday - Orange Brownies

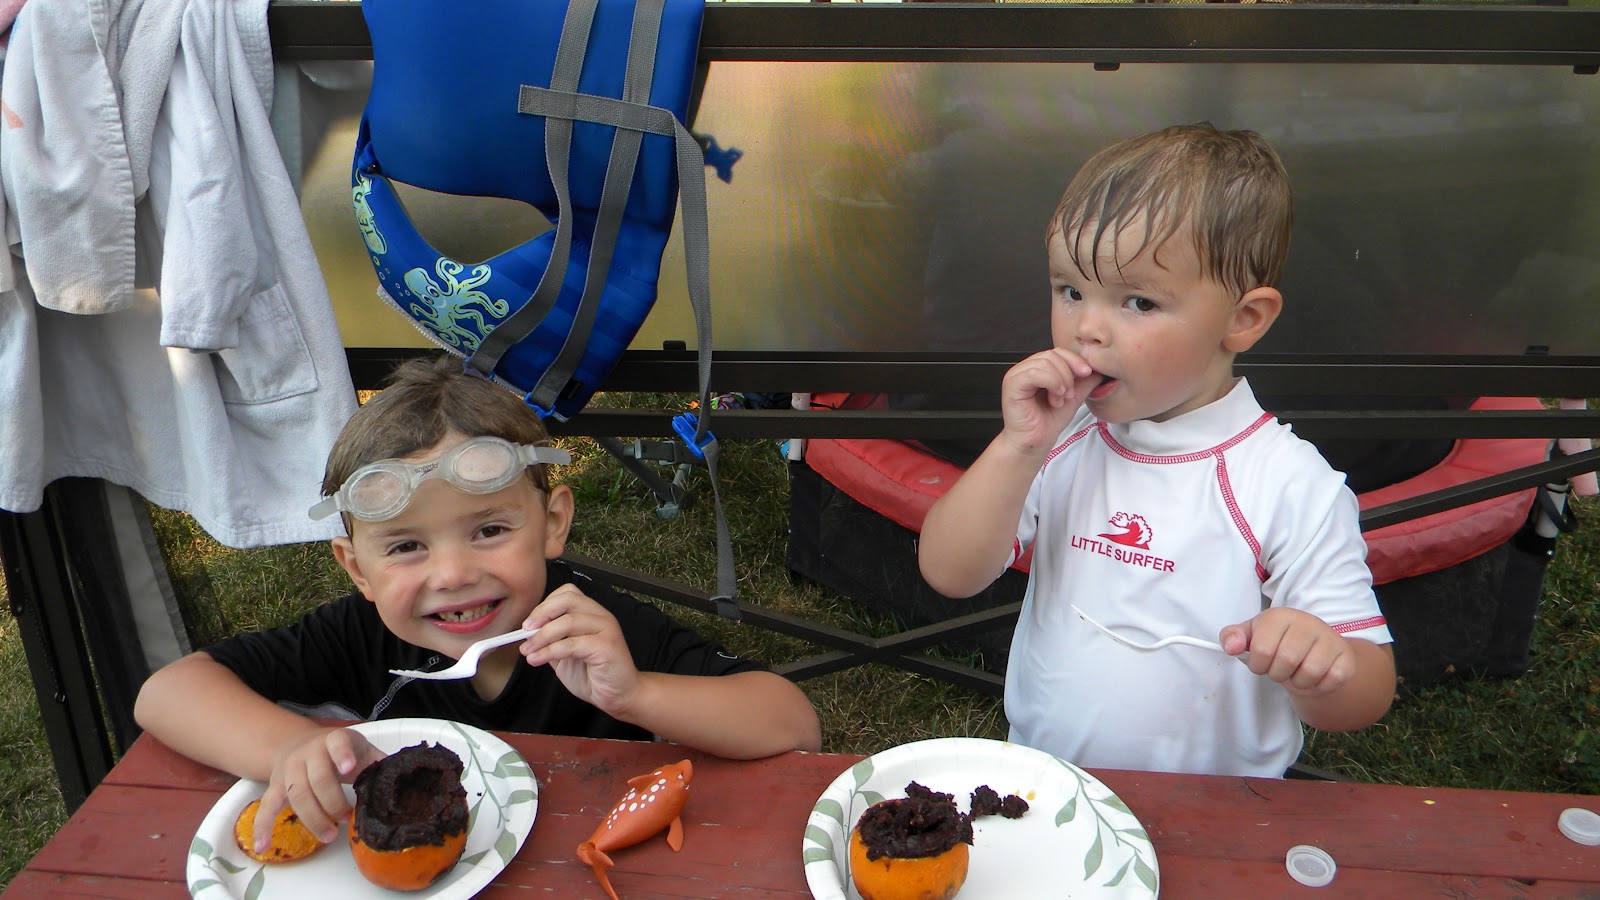
This summer Angela from Angela's Kitchen and myself have been doing a gluten free camping series. I have also teamed up with Bob's Red Mill to work on a camping series with them as well. (I camp all summer so this is what we really eat!) Today's recipe/technique is a bit different but is tons of fun. We are going to bake our brownies in an orange. Yep an orange and it really turns out yummy.

Orange Campfire Brownies
What you need:
1 Bob's Red Mill gluten free brownie mix
3/4 cup warm water
2 tsp orange extract
1 egg
3/4 cup melted butter
12 - 14 oranges

Directions:
Cut the top off an orange and run a knife around the inside edge of the orange. You want to get most of the orange out because that is what we bake in. There will be some left in the bottom that you can't easily get out and that is alright. You can also try a grapefruit spoon but it works about as well as the knife does. After you have the orange hollowed out place the lid back on the top and repeat with the rest of the oranges. When all the oranges have been hollowed out make the brownie batter as directed on the package, substituting the orange extract for the vanilla. Fill each orange almost full with the brownie batter and tap gently to help batter settle in. Top with the top slice of orange peel and wrap with foil, making sure to keep the orange upright. Next place the oranges around the coals of the fire and turn every 2 1/2 to 5 minutes depending on the heat of your fire. They bake 12-20 minutes depending on the heat of your fire. They will still look wet on top of the brownie but that is from the orange top. Let cool a few minutes and enjoy!


They were voted as yummy.

Monday, July 16, 2012

Misc. Monday - Where do you can?

Watching kids play while the canner goes
Screen room and a great fan is key!
As some of you know my parents, my two boys and myself camp all summer. It is 12 miles away from home but it is another world where my boys are allowed to be messy, dirty and have fun. This also means that we can while we are camping all summer. The kitchen is nice but it gets crowded fast and the children are underfoot. My solution is to can outside. Yes, even when it was 100 plus outside but it keeps the heat outside, so inside says cooler.
Two at once!